|
Text,
Install and Photos by Smalls
Tailgates,
they are perfect for football games
and farm trucks, custom trucks mini
or full size, who needs them? For
this tech article Gauges own Smalls
teams up with Fender Bender Int. and
Auto Extremes to show you the ins
and outs of installing a full tailgate
skin.
First
we need to discuss the equipment needed
to complete this fairly simple task.
The main item needed if course is
a welder. A 110 welder will work but
its best to use a 220 welder with
gas. A grinder of some sort is also
needed. We opted to use 36 grit Blendex
pads on a standard grinder. The wire
speed and voltage was set on 20 and
3 respectfully.
Step
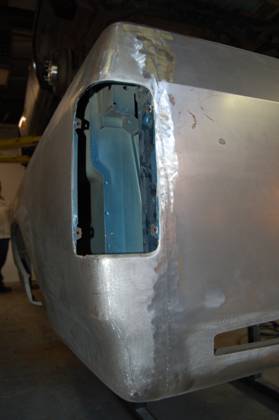
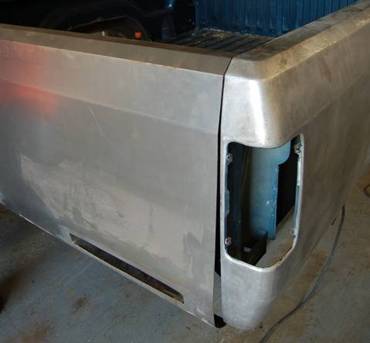
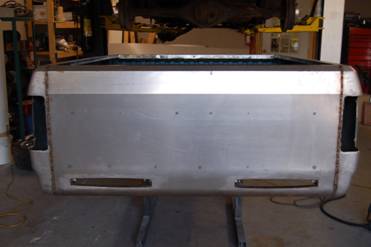
1: Removing unused items
This is what you end up with after
all the useless items are gone. The
tailgate, rear bumper obviously have
to go. We took the bed off the frame,
for us it makes it a little easy to
work with. In our case we scraped
the taillights since we have lights
in the roll pan. You can get skins
with or with out taillights mounted
in just about any location you want.
 Step
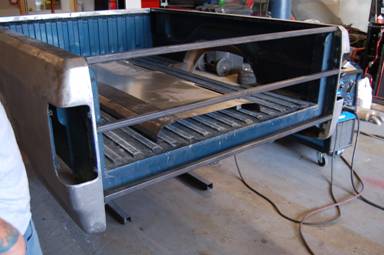
2: Test Fit Step
2: Test Fit
A simple test fit of the skin is needed
to make sure for one that it is the
correct for the bed. Check all body
lines and make sure they line up and
the length is correct. This will more
than likely take more than one person
to do. After the test fit its time
to break out the grinder and remove
any paint in the area where the skin
has to be welded.
 Step
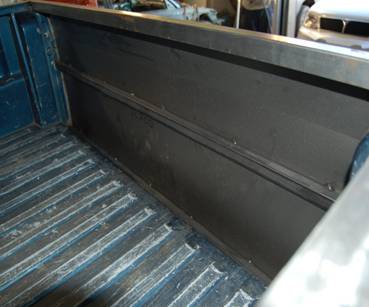
3: Reinforcing Bars Step
3: Reinforcing Bars
Reinforcing bar are installed. One
to have something to weld the skin
to other than just the outer edges,
but more than anything to replace
the support the tailgate gave incase
of an accident. We spaced our bars
out about 8 inches apart. We used
4 bars total. One bar is used at the
very top, two in the middle and one
at the bottom. (Well show the bottom
bar as step 6) This will vary on other
beds. Be sure not to put the bars
at the very edge of the bed. The skin
has to line up with the outer edges.
Its best to place the bars just inside
or about the thickness of skin in
the jam. Weld 3 sides of the bar.
The front side (side against the skin)
does not need to be welded.
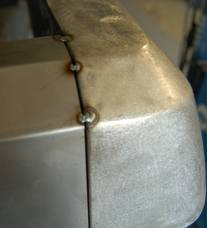 |
 Step 4: Tack Skin into place Step 4: Tack Skin into place
Starting
at the top of the bed use small
tack welds about one and a half
inches apart. Be sure to allow
plenty of cooling time between
welds. You may want to alternate
sides between welds. Some trimming
maybe needed but not a lot.
Once the skin is completely
tacked on it should look like
this. |
 |
 |
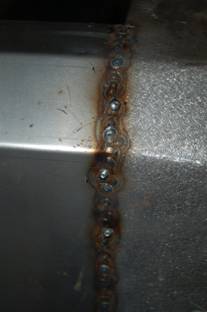
Step
5: Tack welding complete
Continue
tacking until the sides of the
skin look like this. Remember
watch your heat on the metal.
You do not want to get the metal
too hot to the point it warps.
Now on the inside of the skin
tack the bars to the skin. Again
spread out the welds so it doesnt
warp.
|
 |
 |
Step
6: Save your roll pan
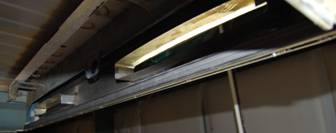 We
installed one last bar after the skin
was completely welded in place. It
is put at the very bottom of the bed
in hopes of saving it from being ripped
off. You may want to add some metal
at the back of your frame that will
be a little below the bed for extra
drag protection. We
installed one last bar after the skin
was completely welded in place. It
is put at the very bottom of the bed
in hopes of saving it from being ripped
off. You may want to add some metal
at the back of your frame that will
be a little below the bed for extra
drag protection.
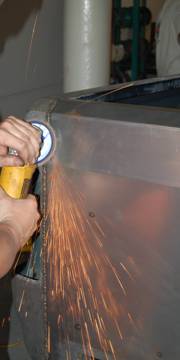
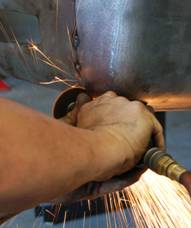
Step
7: Grind smooth
Once
all the welding is complete its time
to grind the welds smooth are see
if there are any places that need
to be spotted again. Once again when
you are grinding dont not work in
one area for a long time. This again
will heat up and warp the metal.
Shopping
Resource:
Get
a tailgate skin just like this for
your truck @ Gauge Store! (Click Here)
Article
Sources:

Fender Bender International - www.fbirides.com
1-877-FBI-MINI (324-6464)

Auto
Extremes - Conyers, GA - www.autoextremes.net 770-761-0971
In
the coming months:
Well
show you the process of making and
installing tail light fillers and
then task of building a full sheet
metal bed. After all that is complete
the bed will be wiped with filler,
sanded smooth and prepped for paint.
|